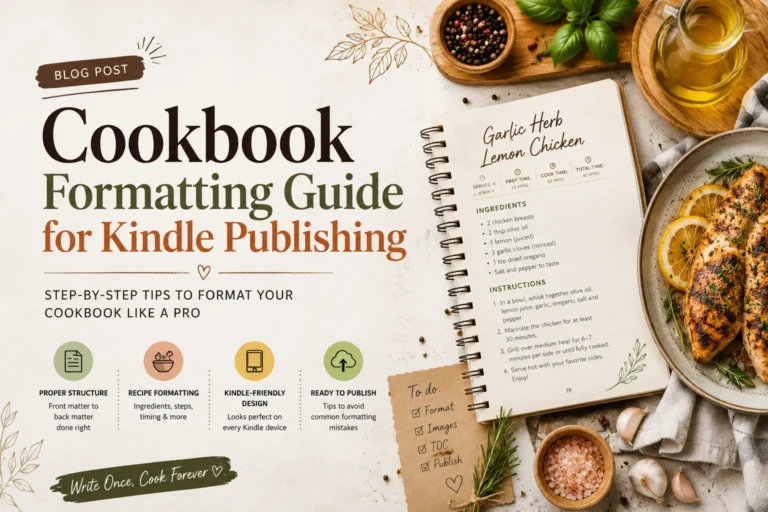
Nobody tells you this when you first publish on Amazon, but the moment your book goes live, it joins a lineup of thousands of other thumbnails all competing for the same fraction of a second of attention. And in that fraction of a second, your Amazon book cover is the only thing standing between a reader clicking on your book or scrolling right past it.
That feels unfair if you just spent a year writing something you are genuinely proud of. But it is the reality of how Amazon works, and once you accept it, you can actually do something about it.
This guide is not going to lecture you about the importance of investing in your cover and then leave you to figure out the rest on your own. We are going to get into the actual specifics: what Amazon cover dimensions to use, how the KDP Cover Calculator works and why skipping it is such a costly mistake, what Cover Creator can and cannot do for you, how to create a hardcover cover without running into surprises, how to properly prepare your cover file before you upload, and what to do when you need to update your cover after your book is already out there. All of it, in plain language.
What a Book Cover Design Is Actually Doing for You
Here is something worth sitting with for a moment. When a reader lands on an Amazon search results page, they are not reading. They are scanning. Their eyes are moving across a grid of small images, and they are making snap judgments based almost entirely on visual instinct. They are not consciously thinking about typography or color theory. They are just feeling whether something looks right or not.
A strong book cover design is doing several things at the same time without the reader realizing any of it. It is communicating what genre the book belongs to before the title is even read. It is suggesting a certain level of quality and professionalism. And it is creating just enough visual interest to make someone want to look a little closer.
Genre signaling is the piece that surprises most first-time authors. If you write psychological thrillers, your cover needs to look like a psychological thriller cover. That means dark tones, high contrast, bold and slightly unsettling typography. If you write light romantic comedies, it means something warm and illustrated with a sense of humor. This is not about copying other covers. It is about speaking the visual language that readers of your genre already recognize and respond to. A cover that breaks from those conventions, even a beautifully designed one, will feel out of place to the very readers you are trying to reach.
And then there is the thumbnail problem. Most of the time your book cover will appear at roughly 100 by 150 pixels on a screen. That is small. Really small. At that size, anything delicate disappears. Thin fonts become unreadable. Busy backgrounds turn into noise. Whatever your cover looks like when you zoom out to thumbnail size in your design software is what readers will actually see. Design for that version first.
Amazon Cover Dimensions: Do This Before You Open Any Design Software
One of the most common and entirely preventable mistakes in book cover design is starting to work before confirming the correct dimensions. Finding out your measurements were wrong after you have a finished design is genuinely painful. It means rebuilding from the ground up, and it is 100 percent avoidable.
What Kindle eBook Covers Need
For a Kindle eBook, Amazon’s recommended size is 2,560 by 1,600 pixels with a 1.6 to 1 aspect ratio. They will technically accept a file with at least 1,000 pixels on the shortest side, but the larger size looks dramatically better on high-resolution screens and modern tablets. There is no good reason to work at the minimum when the recommended size is not any harder to produce. Save your file as a JPEG or TIFF in RGB color mode and keep the total file size under 50 MB.
What Print Covers Need
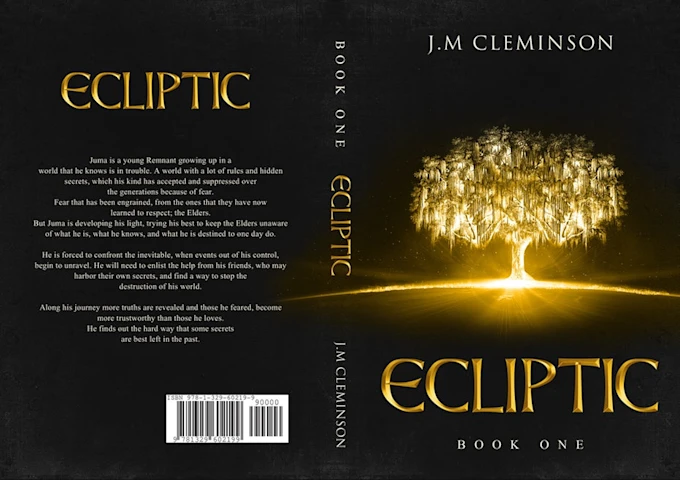
Print covers are a different animal entirely. Your file is not just the front cover. It is a single document that wraps around the whole book, including the back cover on the left, the spine in the middle, and the front cover on the right. All three pieces connected in one continuous file.
The minimum resolution for a print cover is 300 DPI. If you can work at 600 DPI, do it. The difference in sharpness on the physical book is noticeable, especially in text and fine details. Color mode for print is CMYK rather than RGB. You need a bleed of 0.125 inches extending past the trim line on all four outer edges, and the whole file should come in under 40 MB for a clean upload experience.
One thing that genuinely surprises a lot of authors the first time they encounter it: KDP requires at least 79 pages in your book before it will allow any text on the spine at all. Shorter books have to leave the spine completely blank. Worth knowing before you spend time designing spine typography you cannot actually use.
The KDP Cover Calculator: Honestly Just Use It Every Single Time
There is one tool that sits at the beginning of every serious print cover project, and it is completely free. The KDP Cover Calculator lives at kdp.amazon.com/cover-calculator, and you should make a habit of using it without exception every time you work on a print cover, even if you have done this before and think you know the numbers.
The reason is spine width. A lot of authors assume spine width is something you can estimate or look up in a table somewhere. It is not. It is a number calculated specifically for your book based on your exact page count and the paper type you are printing on. White paper uses a multiplier of 0.002252 inches per page. Cream paper uses 0.0025 inches per page.
To make that concrete: a 300-page book on white paper needs a spine of approximately 0.676 inches. That same book on cream paper needs a spine closer to 0.75 inches. If you are a few hundred pages longer or shorter, those numbers shift accordingly, and they have to be right. A spine that is off by even a little will either crowd your front cover design toward the spine edge or create a visible gap. A spine that is significantly wrong will get your file rejected by KDP’s review process.
The Calculator takes your binding type, interior color, paper type, trim size, and page count, and it produces a downloadable cover template with every boundary already laid out for you. Bleed lines, safe zones, spine boundaries, barcode placement area. All of it. Your entire cover design should be built on top of that template. It is the only reliable way to make sure your file passes review the first time you submit it.
How to Create Amazon KDP Book Covers: The Three Honest Options
When authors go looking for information on how to create Amazon KDP book covers, they usually find either oversimplified tutorials that skip the technical realities or deep dives into professional software that feel completely inaccessible. The truth sits somewhere in between. There are three approaches that genuinely work, and the best one for you depends on where you are right now.
The Book Cover Creator for KDP
Cover Creator is built directly into the KDP platform, it costs nothing, and it is considerably more capable than its reputation suggests. You can use it to design covers for eBooks, paperbacks, and hardcovers. It comes with a library of pre-built templates, curated font pairings, and a stock image gallery. You can also upload your own images in JPEG, PNG, GIF, or TIFF format if you want to bring in original artwork or licensed photography.
What Cover Creator does particularly well is handle the spine width calculation automatically. Once you have uploaded your interior manuscript, it figures out the spine measurement for you and builds the template around it. That is genuinely helpful, and it removes one of the more anxiety-inducing parts of print cover design.
The catch is something most tutorials gloss over. You have to wait for your interior manuscript to fully finish uploading and processing before you open Cover Creator. Not mostly done. Completely done. If the manuscript is still being analyzed when you start designing, Cover Creator will generate an incorrect spine width and your whole layout will be built on a bad foundation. This is easy to avoid once you know to watch for it.
There are a couple of real limitations to be aware of before committing to Cover Creator. It does not support Japanese, Hebrew, or Yiddish. Any design you create using images from Amazon’s built-in stock library is locked to the KDP platform. You cannot download the finished cover and use it anywhere else. No author website, no social media graphics, no newsletter headers. If you need your cover artwork for anything beyond the Amazon listing, you will need to work outside of Cover Creator.
Custom Paperback Design Using KDP’s Official Templates
This is how professional cover designers approach KDP projects, and it is the path to take if you want full creative control and the ability to use your cover artwork freely across every channel.
KDP provides official paperback and hardcover manuscript templates that are pre-built to the platform’s exact technical specifications. Every margin, every bleed zone, every spine boundary is already in place before you add anything. When you open one of these templates in Adobe InDesign, Photoshop, Illustrator, or Affinity Publisher, you are working inside a document that already knows the rules. That alone eliminates the majority of technical rejection risk.
A full paperback KDP cover design in this format is one wide horizontal file. Back cover on the left, spine in the center, front cover on the right. The bleed extends 0.125 inches past the trim line on every outer edge. Text and important visual elements should stay at least 0.5 inches in from the trim line so nothing gets cut off in the final printed version. The result is a file that holds up from thumbnail to finished physical book.
Hiring a Professional Cover Designer
For authors who want the best possible result and are not interested in learning design software, working with a professional who designs KDP covers regularly is a straightforward option. A good designer brings genre expertise, technical knowledge of the platform, and the ability to create something that looks like it belongs in a bookstore. Costs vary considerably depending on complexity and the designer’s experience level, but a cover that genuinely converts browsers into buyers tends to pay for itself fairly quickly.
How to Create a Hardcover Cover Without Running Into Surprises
Hardcover cover design through KDP follows the same basic principles as paperback but adds a few requirements that are easy to overlook if you have only ever worked on paperback covers before.
The safe zone for text and images on a hardcover is slightly more conservative. Everything needs to stay at least 0.635 inches from the book edge, compared to 0.5 inches for paperback. The more important difference is the spine hinge. You need to preserve a clear 0.4 inch hinge zone along the inner edge of both the front and back covers, right where they meet the spine. That area flexes every time the book is opened, and anything printed there will eventually distort or become difficult to read. Leave it empty.
One more thing for hardcover books over 120 pages: a black and white headband will be printed at the top and bottom of the spine on the finished book. This is a standard part of hardcover binding and it is not optional or removable. Keep it in mind when you are making decisions about spine design, especially if you are using a color that might clash with a black accent at the edges.
Paperback and Hardcover Manuscript Templates: The Connection Most Authors Miss
Here is a mistake that trips up a lot of authors who approach cover design and book formatting as two separate projects that happen independently of each other. They are not separate. They are tied together through your page count, and if you do not account for that connection, you will almost certainly end up redoing your cover.
Any meaningful change to your interior formatting will shift your page count. Adjusting your margins, changing your font size up or down, editing the manuscript itself, switching your trim size, all of it moves the number. And when the page count moves, the spine width changes. When the spine width changes, any cover template you have already been working from is no longer accurate.
The sequence that saves you from this is straightforward. Finalize your interior formatting first. Decide on your trim size, set your margins, lock in your fonts and chapter structure, and reach a stable page count before you touch the cover. Then use that page count in the KDP Cover Calculator, generate a fresh template, and build your cover on that. Authors who do it the other way around, designing the cover first and formatting the interior later, almost always discover the page count came out differently than expected. Then they are rebuilding a cover they thought was done.
How to Prepare Your Cover File Before You Upload
This is the stage where most rejections happen, and almost all of them are preventable. The review process at KDP is not forgiving of technical errors, but none of the requirements are unreasonable once you know what they are.
File format. Your print cover must be submitted as a single PDF that contains the back cover, spine, and front cover together in one file. KDP will not accept separate files for each section.
Resolution and color. At least 300 DPI throughout the entire file. Do not embed color profiles. KDP strips them before publishing anyway, and leaving them in can cause unexpected color shifts in the final printed version. Avoid spot colors entirely. They are part of offset printing workflows and are not compatible with print on demand.
Text matching. Every word visible on your cover needs to match your Amazon book detail page exactly. Title, subtitle, author name. Not close. Not approximately. The exact same characters in the exact same order. A single difference in capitalization, a missing period, an extra space anywhere, any of it will trigger a rejection.
Barcodes. If you are adding your own barcode, it needs to be 300 DPI, 2 inches wide, and 1.2 inches tall. Place it at least 0.76 inches up from the bottom edge of the cover and at least 0.25 inches away from the spine hinge. If you would rather skip dealing with it, KDP will add one automatically to your back cover. Most authors just let KDP handle it.
How to Update Your Cover After Your Book Is Already Live
A lot of authors do not find out until they actually need it that updating a published cover is completely possible and not particularly complicated. If you want to refresh the design, fix an error you spotted after launch, or update the cover to match a series you have been building, you can do all of that through your KDP Bookshelf without unpublishing or starting over.
Log into your KDP account, find the title you want to update, click into edit mode, and navigate to the cover section. Upload the new file and submit. If you are changing anything else at the same time, your book description, your categories, your manuscript, everything goes through review together as one package. The review window is typically somewhere between 24 and 72 hours before changes appear on the live listing.
There is one thing to pay attention to before you submit. If your new cover shows different title, subtitle, or author name text than what is currently on your book detail page, you need to update the listing to match before submitting. Submitting a cover that contradicts the listing will get the update rejected, and you will need to go back, fix the mismatch, and resubmit. Getting both sides to agree before you hit submit saves you that extra round trip.
One Last Thing Before You Go
Somewhere in the process of writing a book, it is easy to start thinking of the cover as the final task, the thing you deal with once the real work is done. But for readers on Amazon, the cover is the first thing they see, and often the only thing they see before deciding whether to look any closer.
None of this has to be overwhelming. Get the Amazon cover dimensions right before you start designing. Use the KDP Cover Calculator and build your cover from the template it gives you. Understand what Cover Creator can and cannot do before you decide whether to use it. Format your paperback interior first, then build the cover. Prepare your file carefully before uploading. And remember that if something needs to change after launch, updating your cover is always an option.
These are not complicated steps. They are just the steps that actually work. Start at kdp.amazon.com/cover-calculator, generate the template that fits your book, and take it from there.